Hi Friends,
Sharing my learning. Lets get to the point.


Thanks,
Naveen.
Sharing my learning. Lets get to the point.
When a user starts a chat with an Agent, there are two scenarios
as follows,
- Existing contact in CRM
- New Visitor
The process of identifying the contact in CRM is called as
Authentication. The authentication process in MS portals are pretty straightforward
and the steps are mentioned in the link https://www.liveassistfor365.com/en/support/authenticated-visitors-in-the-dynamics-customer-portal/
. But the authentication process in non-MS portals are bit tricky and the steps
are mentioned in the link https://www.liveassistfor365.com/en/support/authenticated-visitors-non-ms-portals/
.
Our interest is to explore Non-MS portal authentication and
we need to understand the communication between Live Assist and Non-MS portal.
The communication between Live Assist and CRM Org has been
established when we completed the provisioning process and we don’t have to
worry about that. We need to establish the communication between Portal and
Live Assist by which the Portal can send information to the Live Assist.
How is the communication works?
Security is of huge importance and so encryption and decryption
is in place. We need to generate RS256 Private and Public key. They come as a
pair which means for a private key there is one public key. So, portal will
encrypt the information with the private key and which will be decrypted by
Live Assist using the public key.
Step 1: Generate RS256 Key pair. There are online key
generators available and also, we can generate them in powershell.
-----BEGIN PUBLIC KEY-----
MIGfMA0GCSqGSIb3DQEBAQUAA4GNADCBiQKBgQDdlatRjRjogo3WojgGHFHYLugd
UWAY9iR3fy4arWNA1KoS8kVw33cJibXr8bvwUAUparCwlvdbH6dvEOfou0/gCFQs
HUfQrSDv+MuSUMAe8jzKE4qW+jK+xQU9a03GUnKHkkle+Q0pX/g6jXZ7r1/xAK5D
o2kQ+X5xK9cipRgEKwIDAQAB
-----END PUBLIC KEY-----
-----BEGIN RSA PRIVATE KEY-----
MIICWwIBAAKBgQDdlatRjRjogo3WojgGHFHYLugdUWAY9iR3fy4arWNA1KoS8kVw
33cJibXr8bvwUAUparCwlvdbH6dvEOfou0/gCFQsHUfQrSDv+MuSUMAe8jzKE4qW
+jK+xQU9a03GUnKHkkle+Q0pX/g6jXZ7r1/xAK5Do2kQ+X5xK9cipRgEKwIDAQAB
AoGAD+onAtVye4ic7VR7V50DF9bOnwRwNXrARcDhq9LWNRrRGElESYYTQ6EbatXS
3MCyjjX2eMhu/aF5YhXBwkppwxg+EOmXeh+MzL7Zh284OuPbkglAaGhV9bb6/5Cp
uGb1esyPbYW+Ty2PC0GSZfIXkXs76jXAu9TOBvD0ybc2YlkCQQDywg2R/7t3Q2OE
2+yo382CLJdrlSLVROWKwb4tb2PjhY4XAwV8d1vy0RenxTB+K5Mu57uVSTHtrMK0
GAtFr833AkEA6avx20OHo61Yela/4k5kQDtjEf1N0LfI+BcWZtxsS3jDM3i1Hp0K
Su5rsCPb8acJo5RO26gGVrfAsDcIXKC+bQJAZZ2XIpsitLyPpuiMOvBbzPavd4gY
6Z8KWrfYzJoI/Q9FuBo6rKwl4BFoToD7WIUS+hpkagwWiz+6zLoX1dbOZwJACmH5
fSSjAkLRi54PKJ8TFUeOP15h9sQzydI8zJU+upvDEKZsZc/UhT/SySDOxQ4G/523
Y0sz/OZtSWcol/UMgQJALesy++GdvoIDLfJX5GBQpuFgFenRiRDabxrE9MNUZ2aP
FaFp+DyAe+b4nDwuJaW2LURbr8AEZga7oQj0uYxcYw==
-----END RSA PRIVATE KEY-----
Step 2: Go to the Live Assist’s Supervisor Portal from the following
link. This settings record is in Settings -> Live Assist-> Settings.

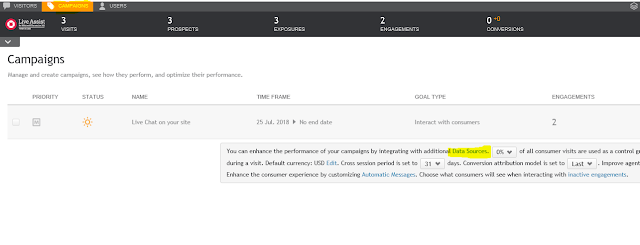
Step 3: Go to Data Sources of your campaign under campaigns
tab.

Step 4: Click “Configure” under Authentication Server

Step 5: Configure values like below,
Select “oAuth 2.0 authentication (Implicit)” from the drop
down. Leave “Authentication endpoint” empty and copy the above mentioned public
key in “JWT Public Key”. Give a JavaScript method name (e.g. auth.getAuthenticationToken)
in the “JS Method Name” and leave other fields as it is.
Note: The JS method name mentioned in this configuration will
be implemented in Portal websites. This method will encrypt the information
using the above mentioned private key and returns the value.

Step 6: Enable authentication for your campaign and publish
the changes. Go to your Campaign -> Engagement and make changes as marked
below.

With this step we have completed configuration in Live
Assist. Now we will do the changes in Portal side.
Step 7: Add the following Java script method in page onload
event of (chat enabled) webpages in your Portal.
var auth = (function (){
return {
getAuthenticationToken: function (callback)
{
console.log("Get Auth
Data");
//var jwt = myPayLoad();
try
{
//
Generate Encrpted Information with RS256 Private Key
//
callback(Generated Encrpted Information);
}
catch (e)
{
console.error(e);
callback(null, "Unable to
generate key");
}
}
};
})();
We have completed all the configurations and know we will see
how to generate the encrypted information.
Imagine that the user login with their username (should be a
field in CRM like email address) and password. Now the website will have this
information and a payload must be created with this information as follows in
the above-mentioned section.
{
"preferred_username": "Jim",
"given_name": "Jim",
"family_name": "Glynn (sample)",
"email": "someone_j@example.com",
"iss": "source string",
"iat": 1542649937,
"exp": 1542620770
}
For this POC, I have used this payload and encrypted
directly in the website https://jwt.io/#debugger
. Please make sure you form the payload dynamically and encrypt the same. Our
JavaScript method looks like follows,
var auth = (function (){
return {
getAuthenticationToken: function (callback)
{
console.log("Get Auth
Data");
//var jwt = myPayLoad();
try
{
console.log("Generated");
callback("eyJhbGciOiJSUzI1NiIsInR5cCI6IkpXVCJ9.eyJwcmVmZXJyZWRfdXNlcm5hbWUiOiJKaW0iLCJnaXZlbl9uYW1lIjoiSmltIiwiZmFtaWx5X25hbWUiOiJHbHlubiAoc2FtcGxlKSIsImVtYWlsIjoic29tZW9uZV9qQGV4YW1wbGUuY29tIiwiaXNzIjoic291cmNlIHN0cmluZyIsImlhdCI6MTU0MjY0OTkzNywiZXhwIjoxNTQyNjIwNzcwfQ.RuBP-_Jgb7ZZJ-gp5SPGn-1P0D0OIvOuDI2qCc5UQd5_WgNC7Iq_ZNYqUVzqJVw0NJgTvkg6994RwqqQTYNhRHraUgEy9TGds-DguIgeeE0EqlKme66U_v9cJFztS3mwhpVqFvrjhcdHNPY-d8MtVhAE3U7eQKciGrk-AwAwL8w");
}
catch (e)
{
console.error(e);
callback(null, "Unable to
generate key");
}
}
};
})();
So, when a chat is initiated the information mentioned in
the payload will be send to CRM/USD and this information can be used to retrieve
the customer record.

Good one Naveen. Thank You.
ReplyDeleteThanks a lot..
Delete